Logistic regression: classify with python

Logistic regression

Logistic regression is a very common and popularly used supervised classification process. When we have categorical data in our hand to make some prediction we tend to apply logistic regression. Classification is a very popular prediction technique. Almost 70% of real-world prediction problems involve categorical variable and hence amenable to classification.

Read about supervised machine learning here

This article covers the basic idea of logistic regression and its implementation with python. The reason behind choosing python to apply logistic regression is simply because Python is the most preferred language among the data scientists. And in the near future also it is going to rule the world of data science.

Here is an exhaustive article on python and how to use it

Why logistic regression not “classification”?

So why the name is “regression” when it performs classification? It is a very natural question you should be asking. So, the answer is it is basically a regression process which becomes a classification process when the process involves a decision threshold for the prediction. Deciding a threshold for the classification process is very important and tricky one too.

We need to decide the decision threshold depending on the particular case in hand. There can be four types of responses in case of classification problems which are “true positive”, “true negative”, “false positive” and “false negative” (will discuss them in a bit while discussing confusion matrix). We have to fix the probability of one type of occurrence while reducing another depending on its severity.

For example, take the case for a severe crime and it is to decide if the person should be hanged or not. It is a problem of binary classification with two outputs guilty or not guilty. Here the true positive case is the person found guilty when he actually has committed the crime. On the other hand, the true negative is the person found guilty when he has not committed the crime.

So, no doubt the true negative case here is of very serious type and should be avoided at any cost. Hence while fixing the decision threshold, you should try to reduce the probability of true negative while fixing the probability of true positive cases.

Here is an exhaustive article on machine learning with python

Logistic regression the basic idea

Though this process is used for classification, basically it is a regression process performed on discrete data. Unlike linear regression predicting response of a continuous variable, in logistic regression, we predict the positive outcome of a binary response variable.

Unlike linear regression which follows a linear function, a logistic regression has a sigmoid function.

Equation for logistic regression
Linear regression
Logistic regression

Classification types in logistic regression

Binary/binomial classification

In binary classification, the response under study can generally be classified into two groups. Examples of binary classification problems are almost everywhere in the real world.

Be it a medical test result to identify if any patient is suffering from a disease or not, a clinical test to declare a product is pass or fail in industrial quality control parameters to simple predicting whether it will rain or not. All of them are the problems of binary classification. As the response can be of only two types either positive (1) or negative (0) corresponding to every duality like “yes-no”, “pass-fail”, “male-female”, “win-loss” etc.

Multinomial classification

Here the response variable has more than two categories and they have no order. For example category of employees can be group A, Group B and Group C. They can not be arranged in any ascending or descending order.

A good example of such data can be the very famous iris data set of Sir Ronald A. Fisher regarded as the Father of statistics for his remarkable contribution. It is very much popular multivariate dataset and since long has been used as an example data set for any kind of pattern recognition problem.

The data set contains information on 3 species of iris plant with 50 instances about each species. The dependent variable here is the three species of iris plant without any order.

Ordinal classification

In this case like the multinomial variable, the response variable has more than two classes. But here the classes can be ranked in some order. Like the financial status of citizen “very poor”, “poor”, “lower middle class”, “middle class”, “rich”, “very rich”.

Any prediction problem may be a problem of binary classification or regression. Which prediction tool you will use depends on the variable type of the response variable. If the response variable is a categorical variable and have a binary response then binary classification is the solution. On the other hand, if the response is a continuous variable then we have to use regression for prediction.

For example, predicting the price of any product depending on its different specifications is a regression problem. But when we have to determine whether a customer will buy the product or not then it is certainly a problem of binary classification. Because here the response is discrete having only two types of responses possible “buy” and “not buy”.

Learn about supervised machine learning here

Application of logistic regression with python

So, I hope the theoretical part of logistic regression is already clear to you. Now it is time to apply this regression process using python.

So, lets start coding…

About the data

We already know that logistic regression is suitable for categorical data. So, the example dataset I have used here for demonstration purpose has been downloaded from kaggle.com. The data collected by “National Institute of Diabetes and Digestive and Kidney Diseases”  contains vital parameters of diabetes patients belong to Pima Indian heritage.

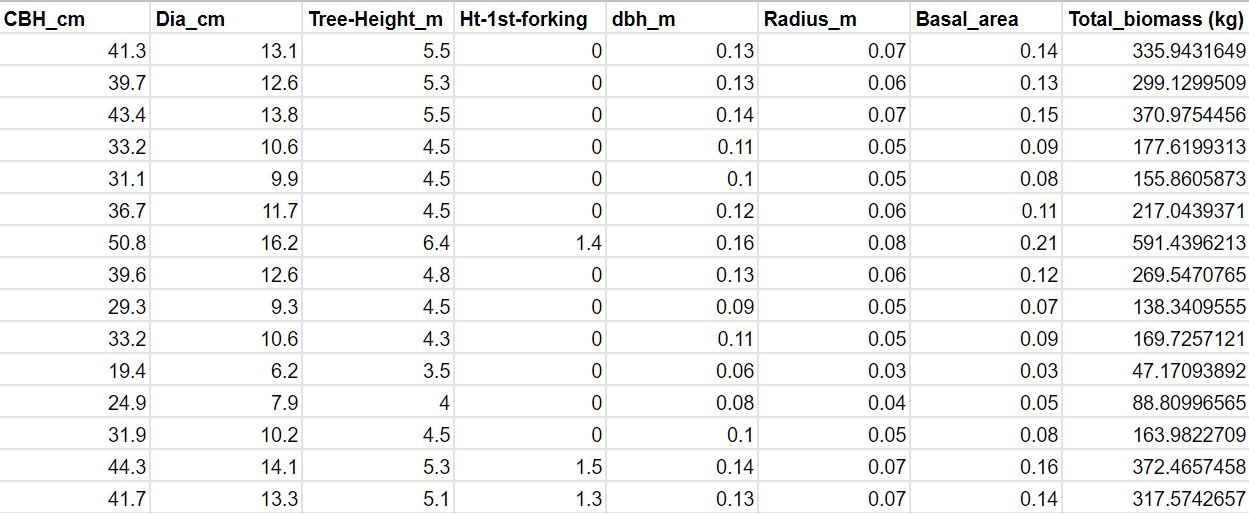
Here is a glimpse of the first ten rows of the data set:

Diabetes data set for logistic regression

The data set has independent variables as several physiological parameters of a diabetes patient. The dependent variable is if the patient is suffering from diabetes or not. Here the dependent column contains binary variable 1 indicating the person is suffering from diabetes and 0 he is not a patient of diabetes.

So, our task is to classify using logistic regression. And to predict as accurately as possible if a person is a diabetes patient from his different other vital parameters.

Importing the libraries

The first step to start coding is to import all the libraries we are going to use. The basic libraries for any kind of data science projects are like pandas, numpy, matplotlib etc. The purpose of these libraries are discussed before in the article simple linear regression with python.

# importing libraries
import pandas as pd
import numpy as np
import matplotlib.pyplot as plt

Reading the dataset

I have already mentioned about the dataset used here for demonstration purpose. The below code is to import the data and store in a dataframe called dataset.

dataset=pd.read_csv('diabetes.csv')
print(dataset)

Here is a glimpse of the dataset

Diabetes data frame in python

Creating variables

As we can see that the data frame contains nine variables in nine columns. The first eight columns contain the independent variables which are some physiological variables correlated with diabetes symptoms. The ninth column showes if the patient is diabetic or not. So, here the independent variables are stored in x and the dependent variable diabetes count is stored in y.

x=dataset.iloc[:,1:2].values
y=dataset.iloc[:,-1].values
print(x)
print(y)

Splitting the dataset in training and test data

For testing purpose, we need to separate a part of the complete dataset which will not be used for model building. The thumb rule is to use the 80% of data for modelling and keep aside the rest of the data. It will work as an independent dataset. Now we need to test the fitted model’s performance using this independent dataset.

#****** Dividing the dataset into training and testing dataset
from sklearn.model_selection import train_test_split
x_train, x_test, y_train, y_test= train_test_split(x, y, test_size=0.2, random_state=0)

Here this data splitting task has been performed with the help of model_selection module of sklearn library. This module has an inbuilt function called train_test_split which automatically divides the dataset into two parts. The argument test_size controls the proportion of the test data. Here the test size is 0.2 so the test dataset will contain 20% of the complete data.

Application of logistic regression

Here we will be using the LogisticRegression class from sci-kit learn.

# Importing the logistic regression class and fitting the model
from sklearn.linear_model import LogisticRegression
model=LogisticRegression()
model.fit(x_train, y_train)

After importing LogisticRegression, we will create an instance of the class and then use it to fit the logistic regression on the training dataset.

Predicting using the test data

# Using the fitted model to predict using the test data
y_pred=model.predict(x_test)

As the model has been trained on the training data set, we will use it to get prediction of the test data set. The fitted model will generate a predicted data set called y_pred using x_test. We already know the original values corresponding to x_test which are in y_test. So we can compare how accurate the prediction is.

Calculating fit statistics

# Calculation different statistics to evaluate model fit
from sklearn import metrics
print("Acuracy:",metrics.accuracy_score(y_test, y_pred))
print("Precision score:", metrics.precision_score(y_test, y_pred))
print("Recall score:", metrics.recall_score(y_test, y_pred ))

The sci-kit learn also have a class called metrics which has some useful functions to calculate fit statistics like accuracy score, precision score, recall score etc.

Model validation statistics

Here we have all the three statistics calculated. The accuracy score 0.82 suggests a good classification which suggests out of 10 observations the model can classify 8 observations correctly.

The precision and recall score are also good measure of classification process. The precision score is to measure the percentage of correct prediction. In this case, the precision score indicates that if using all the physical parameters of a person the logistic regression predicts that he/she is going to suffer from diabetes, then there is 76% chance that the prediction is correct.

The recall score of 61% says that if the test data set already has some diabetes patients, then in 61% cases the classification process can identify it.

You can further generate a more detailed report on the classification performance using classification_report() function from sci-kit learn. See below…

# Detailed classification report
from sklearn.metrics import classification_report
print(classification_report(y_test, y_pred))
Detailed classification report

Creating confusion matrix

Creating a confusion matrix is also an effective way to judge the model. In this case, a 2×2 matrix constitutes true negative, false negative, false positive and false negative values in the four quadrants of the matrix.

A confusion matrix example

The below code is to create the confusion matrix using the metrics class of skit-learn library.

# Creating confusion matrix to check the accuracy of prediction
# import the metrics class
conf_matrix = metrics.confusion_matrix(y_test, y_pred)
conf_matrix
Confusion matrix
Confusion matrix

So, here is the desired confusion matrix. If we compare this matrix with the above model confusion matrix then we can say that the logistic regression has resulted 98 true negative, 9 false positive, 18 false negative and 29 true positive results.

Now, what do they mean? the terms are somewhat technical, so let me explain these terms in respect to this result. Here true negative means when the 0 predictions are correct. So here correct 0 predictions are 98. Likewise in 29 instances, the 1 predictions are correct so these are called true positives, the no. of false positives are 9 that is 9 predictions about 1 are wrong and lastly 18 predictions about 0 are wrong and they are the number of false negatives.

#Creating a heatmap for the confusion matrix
cm=conf_matrix
fig, ax = plt.subplots(figsize=(8, 8))
ax.imshow(cm)
ax.grid(False)
ax.xaxis.set(ticks=(0, 1), ticklabels=('Predicted 0s', 'Predicted 1s'))
ax.yaxis.set(ticks=(0, 1), ticklabels=('Actual 0s', 'Actual 1s'))
ax.set_ylim(1.5, -0.5)
for i in range(2):
    for j in range(2):
        ax.text(j, i, cm[i, j], ha='center', va='center', color='red')
plt.show()

Creating a ROC curve

A Receiver Operating Characteristic (ROC) curve is a good visualization technique to judge the efficiency of classification. The curve plots the true positives over the false positives and hence the optimization and adjustment of sensitivity along with specificity.

# Creating Reciever Operating Characteristic (ROC) curve
y_pred_proba = model.predict_proba(x_test)[::,1]
fpr, tpr, _ = metrics.roc_curve(y_test,  y_pred_proba)
auc = metrics.roc_auc_score(y_test, y_pred_proba)
plt.plot(fpr,tpr,label="data 1, auc="+str(auc))
plt.legend(loc=4)
plt.show()
ROC curve for logistic regression

Here you can see an AUC score 0.87 which suggests a good classification. The score varies between 0 to 1. A score of 1 suggests perfect classification whereas any score below 0.5 suggests a poor classifier.

Conclusion

Logistic regression is a very uncomplicated classification technique based on a very simple logic. Thus computation resource required by it is comparatively much less. Another big plus of this technique is this process does not require feature scaling. So, no surprise that logistic regression has always been a favourite choice among data scientists to deal with classification problems.

But as a flip side of such simplicity logistic regression is not very efficient to perform classification when there are too many classes among the variables. It is also prone to overfitting and can not handle data with non-linear nature. There are modern machine learning techniques like Naive Bayes, support vector regression, Random Forest, decision tree etc. which are much more capable than logistic regression in handling complex data.

References

Random forest regression and classification using Python

Random forest regression and classification

As you all know that in today’s world of data explosion, machine learning plays a very crucial role to analyze such a huge amount of data. There are several machine learning algorithms which are making our lives easier to handle large database. Random forest algorithm is one of them and can be regarded as the most important and efficient supervised machine learning techniques.

Random forest is a kind of ensemble method of learning technique which makes a more accurate prediction by using more than one models at a time instead of only one machine learning method.

The speciality of the random forest is that it is applicable to both regression and classification problems. When the data is categorical, then it is the problem of classification, on the other hand, if the data is continuous, we should use random forest regression.

Random forest and decision tree

Random forest is a collection of decision trees where each decision tree has trained with a different dataset. The more decision tree a random forest model includes, the more robust and accurate its result becomes. It is like as we consider a forest a robust one if it has many trees. 

Random forest with n number of decision trees

Random forest actually makes a final prediction from the prediction obtained from each of the decision tree models to overcome the weakness of a single decision tree model. In this sense, the random forest is a bagging type of ensemble technique. 

Now to understand what is bagging we need to know a little about the ensemble method.

Ensemble method 

The random forest provides much more precise result mainly because of the fact that it is a kind of ensemble method, which uses more than one machine learning method at a time to improve the accuracy of the prediction.

A schematic diagram of ensemble method

Bagging

The name is actually Bootstrap Aggregation. It is essentially a random sampling technique with replacement. That means here once a sample unit is selected, it is again replaced back for further future selection. This method works best with algorithms which tend to have higher variance and bias, like decision tree algorithm.

Bagging method runs different model separately and for the final prediction output aggregates each model’s estimation without any bias to any model.

The other ensemble modelling technique is:

Boosting

As an ensemble learning method, boosting also comprises a number of modelling algorithm for prediction. It associates weight to make a weak learning algorithm stronger and thus improving the prediction. The learning algorithms also learn from each other to boost the overall model performance.

In the case of decision tree, the main problem is that the prediction is hugely dependent on the training dataset. As soon as the training data changes, the prediction result also differs. And many a time the decision tree also suffers from the problem of overfitting.  

Advantages of random forest

Different modelling approaches have their own merits and demerits. The beauty of this modelling approach is that it is very efficient in capturing tabular data both numerical and categorical nature with th condition that the category is not more than one hundred. 

It is a single algorithm which is capable of performing both classification and regression tasks depending on the nature of the data. 

Besides as it combines a no. of decision trees in its process, the prediction becomes much more accurate. If we imagine a decision tree as a single tree then the random forest is literally a forest comprising many decision trees, hence the name random forest.

Random forest is capable of handling large database and thousands of input variables.

This machine learning method also comprises a very efficient method of handling missing observation in the dataset.

Application of random forest for regression using Python

This is what you must be waiting for, using python libraries to apply random forest with your data. So lets start coding. We will start with random forest regression with continuous data and then we will take an example of categorical data and apply random forest classification technique.

Random forest regression algorithm of sci-kit learn library is very popular ensemble modelling technique. We will use the RandomForestRegression() class here to perform the regression.

About the data set

The dataset I have used here for demonstration purpose is downloaded from https://www.kaggle.com. The dataset contains the height and weight of persons and a column with their genders. The original dataset has more than thousands of rows, but for this regression purpose, I have used only the first 50 rows containing data on 25 male and 25 females.

So, let’s jump to the most fun part of the article, that is coding with python:

Importing libraries

The first step to start coding is to import all the libraries we are going to use. The basic libraries for any kind of data science projects are like pandas, numpy, matplotlib etc. The purpose of these libraries are discussed before in the article simple linear regression with python.

# importing libraries
import pandas as pd
import numpy as np
import matplotlib.pyplot as plt

Reading the dataset

I have already mentioned about the dataset used here for demonstration purpose. The below code is to import the data and store in a dataframe called dataset.

dataset=pd.read_csv('weight-height.csv')
print(dataset)

Here is a glimpse of the dataset

Dataset for random forest regression

Creating variables

As we can see that the dataframe contains three variables in three columns. We are interested in only the last two columns. We want to regress the weight of a person using the height of him/her. So, here the independent variable height is stored in x and the dependent variable weight is stored in y.

x=dataset.iloc[:,1:2].values
y=dataset.iloc[:,-1].values
print(x)
print(y)

Fitting random forest regression

The below code used the RandomForestRegression() class of sklearn to regress weight using height. As the fit is ready, I have used it to create some prediction with some unknown values not used in the fitting process. The predicted weight of a person with height 45.8 is 100.50

# Application of random forest regression  
from sklearn.ensemble import RandomForestRegressor # this is the required algorithm for the task 
regressor = RandomForestRegressor(n_estimators = 100, random_state = 0) 
  
# fitting the random forest regression with the data
regressor.fit(x, y)  
#predicting the output
Y_pred = regressor.predict(np.array([45.8]).reshape(1, 1))  
Y_pred
The predicted value for height 45.8

Creating a fit plot with the predicted values

The following code is to visualize the prediction result against the original values. This is a way through which we can visualize how good the regression is performing.

# Creating a plot with the predicted result
X_grid = np.arange(min(x), max(x), 0.01)  
  
# Making the one dimensional X_grid a two dimensional variable                  
X_grid = X_grid.reshape((len(X_grid), 1)) 
  
# Create a scatter plot with the original variables
plt.scatter(x, y, color = 'blue')   
  
# Creating a line with the predicted data
plt.plot(X_grid, regressor.predict(X_grid),  
         color = 'blue')  
plt.title('Random Forest Regression') 
plt.xlabel('Position level') 
plt.ylabel('Salary') 
plt.show()

So, here is the regression fit plot.

Fit plot for random forest regression

Application of random forest for classification using Python

So, we learned about random forest regression and how we can implement it with python. Now it is time to implement random forest classification. The same sci-kit learn library we used for regression also has a very efficient algorithm for performing this classification process. Here we will apply the RandomForestClassification() function of this library.

So, let’s start coding to perform classification using random forest algorithm.

About the data set

The data set used here is the very famous iris data set of Sir Ronald A. Fisher regarded as the Father of statistics for his remarkable contribution. It is very much popular multivariate dataset and since long has been used as an example data set for any kind of pattern recognition problem.

The data set contains information on 3 species of iris plant with 50 instances about each species. All the three classes are linearly separable from each other. The dependent variable here is the species of iris plant and the three independent variables are sepal length, sepal width, petal length and petal width measured in cm.

The idea behind the data set is that the particular species of any iris plant can be identified with these four variables determining the flower characteristics. Here also we are going to use this random forest classification algorithm to classify the data. And thereafter using that fitted classification model to predict the species of an unknown iris plant using the independent variables.

So, lets start coding…

Importing libraries

The first step to start coding is to import all the libraries we are going to use. The basic libraries for any kind of data science projects are like pandas, numpy, matplotlib etc. and with them sklearn library for the random forest classification algorithm.

Know the functions of all these libraries here.

# importing libraries
import pandas as pd # for dataframe operations
import numpy as np # for matrix operations
from sklearn.model_selection import train_test_split # for splitting the dataset for training and testing dataset
from sklearn import datasets #importing the sklearn library for the iris dataset
from sklearn.ensemble import RandomForestClassifier # for applying random forest classification

Loading the dataset

The iris dataset being a popularly used example dataset is already provided with sklearn library. We need to load the dataset in our workspace before we are going to use it. I am storing the dataset with the name dataset.

# loading the iris dataset
dataset=datasets.load_iris() 

Now to check the dataset we need to check the target and features i.e. the dependent and independent variable classes of the data. Here we will print these information to check them.

print(dataset.target_names) #printing the target names
print(dataset.feature_names)#printing the feature names
the output view

Storing the data into a dataframe

The data is loaded into workspace but until it is in the form of a dataframe we can not apply other data analysis functions. So here lets store the data into a dataframe named test.

# creating a dataframe from the dataset
test=pd.DataFrame({'sepal length':dataset.data[:,0],
                  'sepal width':dataset.data[:,1],
                  'petal length':dataset.data[:,2],
                  'petal width':dataset.data[:,3],
                   'species':dataset.target})
test

Below is a view of few rows of the newly created dataframe of dimension 150X5.

Dataset for random forest classification
View of the dataframe containing the iris dataset

Crating dependent and independent variables

To apply classification algorithm, first of all we need the dependent and independent variables. So here we will store these variables fetching data from dataset.

Now as we have created two variables x and y storing independent and dependent values respectively, we need to split them. This splitting is to create training and testing dataset with a proportion of 80% and 20% of the total data respectively.

# Dividing the data for training and testing 
x=test[['sepal length','sepal width', 'petal width']]
y=test['species']
x_train, x_test,y_train, y_test=train_test_split(x,y,test_size=0.2, random_state=0)

Application of Random Forest Classification

The below code does the main task of classifying the data using the RandomForestClassifier() of sklearn library. Then a variable pred is created to store the predicted values applying the classification fit on the test dataset.

# applying RandomForest classification algorithm
classify=RandomForestClassifier()
classify.fit(x_train, y_train)
pred=classify.predict(x_test)

Checking the accuracy of the classification fit

The sklearn library also has a function called accuracy_score() which tells how accurate the classification is. Here the accuracy value we get is 0.93, which is quite satisfactory.

# testing the accuracy of the result
from sklearn import metrics
print("Acuracy:",metrics.accuracy_score(y_test, pred))

References

Support Vector Regression using Python

Support Vector Regression using Python

Support vector regression (SVR) is a kind of supervised machine learning technique. Though this machine learning technique is mainly popular for classification problems and known as Support Vector Machine, it is well capable to perform regression analysis too. The main emphasis of this article will be to implement support vector regression using python.

Selecting Python for its application is because Python is the future of data science. Python is already the most popular general-purpose programming language amongst the data scientists. Python is an old language and came into existence during the 90s. But it takes decades for the data science enthusiasts to pick it as the most favourite tool. During 2010 it starts to gain popularity very rapidly.

You can get details about python and its most popular IDE pycharm here.

When we use support vector machine for the classification problem, then it is finding out a hyperplane to classify different classes exists in the data. On the other hand, if it is a regression problem then the hyperline is rather a continuous line predicting the response for some known predictors.

Support Vector Regression and hyperplane

See the above figure, here the two classes of observations that are red and blue classes are classified using a hyperlink. It looks very easy, is not it? But sometimes a simple straight line is not enough to classify them. See the below figure.

In this case, no straight line can not completely classify all the points. So here we have to create a third dimension.

As a new third axis has been introduced now we can see that the classes are now can be easily done. Now how it will look if the figure is again converted to its two dimensional version? see it below.

So, a curved hyperline has now separated the classes very effectively. This is what a support vector regression does. It finds a hyperplane to classify the points and then any new point gets assigned its class depending on which side of the hyperplane it resides.

How SVR is different from traditional regression?

It is a very basic question. Why should one go for support vector regression? how it is different from the traditional way of doing regression i.e. OLS (Ordinary Least Square) method?

In OLS method our purpose is to minimize the error as much as possible. Here we try to find a line which has the least distance from all the points. In mathematical notation, the line should fulfil the following condition:

Where yi is the observed response and yi_hat is the predicted response. So, the line should produce the minimum value for the sum of square of the difference between these two values.

But in case of support vector regression, it allows the user to select a range within which the error will be limited. So, the hyperplane/line will be lying within this range set by the researcher. These range is enclosed by two decision boundaries.

So, in the above figure the green line in between is the hyperline. The two black lines at the same distance from the hyperplane are limiting the error of the prediction. The task of support vector regression is to find out this hyperline with maximum number of points between this two decision boundaries.

I think the theoretical idea discussed above will give you a clear enough idea about what is support vector regression and what purpose it serves. With this knowledge we will now dive into its implementation part.

Application of Support Vector Regression using Python

So let’s start our main business that is application of Support Vector Regression using Python. To start coding we have to call the same libraries as we used in Simple Linear Regression and Multiple Linear Regression before.

Calling the libraries

We have to import the Pandas, numpy, matlotlib and seaborn.

import pandas as pd
import numpy as np
import matplotlib.pyplot as plt
import seaborn as sn

Importing the dataset

Here I have used an imaginary database which contains data on tree total biomass above the ground and several other tree physical parameters like tree commercial bole height,  diameter, height, first forking height, diameter at breast height, basal area. Tree biomass is the dependent variable here which depends on all other independent variables.

Here is a glimpse of the database:

Dataset for  regression

So here the dependent variable is total_biomass(kg) and we will regress it using all the independent variables here.

dataset=pd.read_csv('tree.csv')
dataset
Glimpse of the database

Describing the dataset

To have a first hand idea about the data in hand, the describe function of Pandas is very useful. All the basic descriptive statistics help us to know the data well.

# take a look of the dataset
dataset.describe()
Descriptive statistics of the dataset

Removing the rows with missing values

This is an important step before you start analysing your data. The raw dataset contains several rows with missing values. These missing values are a big problem during analysis. Thankfully python has a very useful function called dropna() which makes all the rows with missing values disappear.

dataset.columns
#printing the number of rows and columns of the dataset
print(dataset.shape)
# removing the rows with mmissing values
dataset.dropna(inplace=True)
# again print the row and columns to see there is any change in number of rows
print(dataset.shape)
print(dataset.head(5))

Here we can see in the below output, the number of rows and comumns of the dataset has been displayed twice. The values are same in both the cases. This is because the dataset does not have any missing values. So, before and after applying dropna() the rows number is the same.

If there had been missing values, the row numbers in the later case would be lesser.

Producing a heatmap

A heatamp is a very good way to get an idea about the relationship between the variables. The seaborn library has this function of producing heatmap where colour varies from darker shade to lighter one as the correlation between the variables get stronger.

# producing a heatmap to show the correlation between the variables
f=plt.subplots(figsize=(10,10))
sn.heatmap(dataset.corr(),annot=True,fmt='.1f',color='green')
Heat map of the variables showing the correlation between them

Creating variables from the dataset

If you check the data set, the last column is for dependent variable and rest are all for independent variables. So, here I have stored all the independent variables in variable x and the dependent in y.

So, here x is a two dimensional arrow whereas y is one dimensional. To make the variables amenable to further analysis, they need to be two dimensional. So, here a function reshape() has been used to make y a two dimensional array.

x=dataset.iloc[:,: -1].values
y=dataset.iloc[:,-1].values
# to convert the one dimensional array to a two dimensional array
y=y.reshape(-1,1)

Feature scaling of the variables

Before using the variables in support vector regression, they need to be feature scaled. The following code is for transforming both the variables.

# Feature scaling
from sklearn.preprocessing import StandardScaler
std_x=StandardScaler()
std_y=StandardScaler()
x2=std_x.fit_transform(x)
y2=std_y.fit_transform(y)

Fitting the Support Vector Regression

Here comes the most important part of coding where we will perform Support Vector Regression using the SVR() function of SVM module of sklearn library.

# fitting SVR 
from sklearn.svm import SVR
regressor= SVR(kernel='rbf')
regressor.fit(x2,y2)

Visualizing the prediction result of SVR

As we get the model, the next step is to use the model for prediction.

# visualizing the model performance
plt.scatter(x2[:,0],y2,color='red')
plt.scatter(x2[:,0],regressor.predict(x2),color='blue')
plt.title('Prediction result of SVM')
plt.xlabel('Tree CBH')
plt.ylabel('Tree Biomass')

For plotting the predicted output I have selected the variable tree CBH. In the scatter diagram, the red points represent predicted values and the blue ones are the observed values. The predicted value plotted against the independent variable clearly show a close match with the observed values. So, we can conclude that the model performs well enough for predicting Tree Biomass based on different tree physical parameters.

References

Multiple Linear Regression with Python

Multiple linear regression

Multiple linear regression(MLR) is also a kind of linear regression but unlike simple linear regression here we have more than one independent variables. Multiple linear regression is also known as multivariate regression. As in real-world situation, almost all dependent variables are explained by more than variables, so, MLR is the most prevalent regression method and can be implemented through machine learning.

Mathematical equation for Multiple Linear Regression

An MLR model can be expressed as:

Yn = a0 + a1Xn1 + a2Xn2 + ⋯ + aiXi + ∈n → (Xn1 + ⋯ + Xni ) + ∈n

In the above model, the variable Yn represents response for case n and it has a deterministic part and a stochastic part; a0is the intercept, i is no. of independent variables, ai and Xi are the regression coefficients and values of independent variables, respectively and ivaries from 1 to n

The main purpose of applying this regression technique is to develop a model which can explain the variance in the response as much as possible using the independent variables. The ratio of the explained variance by the model to the total variance of the response is known as the coefficient of determination and denoted by R2. We will discuss this statistic in detail later. 

But it is an important parameter in regression modelling to ascertain how good the model is. The value of R2 varies between 0 to 1. Now three situations regarding the fitting of the model we may face which are underfitted model, good fit and overfitted model.

Underfit model

This situation arises when the value of R is low. Low R2 value indicates that the proposed model is not explaining the variation of the response adequately. So, the model needs improvement.

Good-fit model

Like, in this case, we have a good R2 value. Which suggests a good fit of the model and it can be used for prediction.

Overfit model

Sometimes models become too complex with lots of variables and parameters. Such complex models get trained by the data too well and give a very high R2 value almost close to 1.0. But they can not predict well when tested with a different set of data. This is because the model being too complex becomes too specific to a particular situation. Such models are called overfitted models.

Dataset used

The dataset used here is the same we used in the Simple Linear Regression. But in this case all the explanatory/independent variables were considered for modelling purpose. The database is an imaginary one and based on my experience of modelling tree data. 

The dataset contains data on tree total biomass above the ground and several other tree physical parameters like tree commercial bole height,  diameter, height, first forking height, diameter at breast height, basal area. Tree_biomass is the dependent variable here which depends on all other independent variables.

Here is a glimpse of the database:

If you find any difficulty to understand the variables, just don’t bother about their names. Take them as two categories of variables, one is dependent variable, I have denoted it with y here and others are independent variable1, 2, 3 etc. Important is the relationship between these two categories of variables. Whatever their names maybe, you just have to have some experience in their relations.

Assumptions for multiple linear regression

We conduct the regression process assuming some conditions. Without holding these conditions, it is not possible to proceed with the regression process. These are called regression assumptions and they are as below:

Assumption of linearity:

There must be a linear relationship between the independent variables and the response variable. The variables in this imaginary dataset have a linear relationship between them. You can easily check this property by plotting the response variable against each of the explanatory variables. 

Assumption of Homoscedasticity:

The residuals or errors that is the difference between observed and estimated values must have constant variance.

Assumption of multivariate normality:

The residuals should follow a normal distribution. We can prepare a normal quantile-quantile plot to check this assumption.

Assumption of absence of multicollinearity:

There should be no multicollinearity between the independent variables i.e. the independent variables should not be linearly related to each other.

Application of Multiple Linear Regression using Python

The main purpose of this article is to apply multiple linear regression using Python. This is the most important and also the most interesting part. So let’s jump into writing some python code. Like simple linear regression here also the required libraries have to be called first.

Calling the required libraries

We will be using fore main libraries here. For handling data frame and arrays NumPy and panda, for creating plots matplotlib and for metrics operations sklearn. These are the most important libraries for data science applications. 

import numpy as np
import pandas as pd
import matplotlib.pyplot as plt
from sklearn import metrics

Importing the dataset

To import the tree dataset as mentioned earlier we will use the import function of panda library.

***** Importing the dataset ***********
dataset=pd.read_csv('tree.csv')

Defining variables

Now the next important task is to tell Python about the dependent and independent variables of the dataset. As the protocol says we will store the dependent variable in y and the independent variables in x. As I have already explained above the dataset contains one dependent variable and 7 independent variables.

So we will store the variables in two NumPy arrays. As x has to store 7 independent variables, it has to be a 2-dimensional array. Whereas being a variable with only one column, y can do with one dimension. So, the python code for this purpose is as below:

#***** Defining variables *************
x=dataset.iloc[:,: -1].values
y=dataset.iloc[:,-1].values

Here the “:” denotes the rows. As the dataset contains the dependent value i.e. tree_biomass values as the extreme right column so, python indexes it with -1.

Checking the assumption of the linear relationship between variables

For example, here I have plotted the tree_height against the dependent variable tree_biomass. Although it is evident that with the increase of tree height the biomass will certainly increase. Still, a scatterplot is a very handy visualization technique to double-check the property. You can prepare this plot very easily using the below code:

#********* Plotting dependent variable against any independent variable 
plt.scatter(x[:,2],y) # accessing the variable tree_height
plt.title("Checking linearity between dependent and independent variables")
plt.xlabel("Tree height")
plt.ylabel("Tree biomass")

I have stored the variables in numpy array earlier. So, to access them we have to just mention which variable we intend to plot. For plotting we have used the plt function of matplotlib library.

And here is the plot:

The plot suggests almost a linear relationship between the variables.

Splitting the dataset in training and test data

For testing purpose, we need to separate a part of the complete dataset which will not be used for model building. The thumb rule is to use the 80% of data for modelling and keep aside the rest of the data. It will work as an independent dataset once we come up with the model and need to test it.

#****** Dividing the dataset into training and testing dataset
from sklearn.model_selection import train_test_split
x_train, x_test, y_train, y_test= train_test_split(x, y, test_size=0.2, random_state=0)

Here this data splitting task has been performed with the help of model_selection module of sklearn library. This module has an inbuilt function called train_test_split which automatically divides the dataset into two parts. The argument test_size controls the proportion of the test data. Here it has been fixed to 0.2 so the test dataset will contain 20% of the complete data.

Application of multiple linear regression

Here comes the main part of this article that is using the regression to regress the response using the known values of more than one independent variables. As in the above section, we have already created train dataset. The following code will use this train data for model building.

#********* Application of regression
from sklearn.linear_model import LinearRegression
regressor=LinearRegression()
regressor.fit(x_train, y_train)

As it is also a linear regression method, so the linear_model module of sklearn library is the one containing the required function LinearRegression. Regressor is an instance created to apply the LinearRegression function.

Getting the regression coefficients for the regression equation

As the regression is done, we need the regression equation. This equation is actually the relation between the dependent and independent variables defined by some coefficients. Using these coefficients we can determine how a unit change in any of the independent variables is going to affect the dependent variable.

#******** Getting the coefficients stored in a dataframe
#*****************************************************************
# storing the column names of independent variables
pos=[1,2,3,4,5,6,7]          
colnames=dataset.columns[pos]
print(colnames)
# creating a dataframe storing the coefficients along with the independent variable names
regressor.intercept_
coef_df=pd.DataFrame(regressor.coef_,colnames,columns=['Coefficients'])
coef_df

In the above section of code, you can see that first of all the position of the independent variables are stored in a variable. And then the corresponding coefficients are fetched from the instance regressor created from LinrarRegression function of linear_model module of sklearn. The coefficients are from regressor.coef_ and the intercept in regressor.intercept_.

Printing the regression coefficients

The regression equation

With the help of these coefficients now we can develop the multiple linear regression.

The multiple linear regression equation

So, this is the final equation for the multiple linear regression model.

Using the model to predict using the test dataset

Now we have the model in our hand. But how can we test its efficiency? If the model is a good one then it should have the capability to predict with precision. And to test that we will need independent data which was not involved during model building.

Here comes the role of test dataset that we kept aside at the very beginning. We will predict the response using the test dataset and compare the prediction with the observations we already have in our hand. The following code will do the trick for us.

And here is the comparison. I have created a dataframe with the observed and predicted values side by side for the ease of comparison.

Comparing the original and predicted values

In the above figure, I have shown only the first 15 values of the dataframe. But it is enough to show that the prediction is satisfactory. 

Goodness of fit of the model 

We have tested the data and got a good prediction using the model. However, we have not quantified yet. We do not have any number to ascertain how good is the model. Here I will discuss such fit statistics that are very useful in this respect. If we have to compare multiple models then these numbers play a crucial role to find the best out of them.

The following code will deliver fit statistics popularly used to judge the goodness of any statistical model. These are coefficient of determination denoted as R2 is the proportion of variance exists in the response variable explained by the proposed model. So the higher its value better is the model. 

Coefficient of determination (R2)

Suppose our test dataset has n set of independent and dependent variables i.e. (x1,x2,…,xn), (y1,y2,…,yn)respectively. Now using our developed model the prediction we achieved has the predicted values (v1,v2,…,vn). So, the total sum of square will be:

This is the total existing variation in the response variable.

Now the variation explained by the model we developed is the regression sum of square and can be calculated as

So as the definition of the coefficient of determination goes, it can be calculated as:

Again it can be farther simplified by breaking down the regression sum of square as the variance explained subtracting the unexplained variance from the total variance. The unexplained variance is actually the variance the model is not able to explain. It is also known as error or residual sum of square and calculated as:

So, now we can rewrite the equation of R2 as

#****** Calculating fit statistics
r_square=regressor.score(x_train, y_train)
print('Coefficient of determination(R square):',r_square)
from sklearn import metrics
print('Mean Absolute Error:', metrics.mean_absolute_error(y_test, y_predict))
print('Mean Squared Error:', metrics.mean_squared_error(y_test,y_predict))
print('Root Mean Squared Error:', np.sqrt(metrics.mean_squared_error(y_test, y_predict)))

Mean Absolute Error(MAE)

This is another popular measure for model fit. As the name suggests, it is the simple difference between observed and predicted values. As we are only interested in the deviations, so we will take here the absolute value of the differences. So the expression will be:

As it measures the error of the estimated values so a lowe MAE suggests better model.

Mean Squared Error (MSE)

This is also a measure of the deviation of the model estimation from that of the original values. But instead of the absolute values, we will take the squared values of the deviations. So many a time it is also called Mean Squared Deviation (MSD) and calculated as:

Root Mean Squared Error (RMSE)

As the name suggests, this measure of fit first calculates the difference between the observed and model-predicted values, takes the square of each error then calculates the mean and ultimately calculates the square root to get the RMSE. So its equation is:

Fit statistics

How can the fitting further be improved?

There is always scope for improving the model so that it can give more precise prediction. As we already know that the main purpose of Multiple Linear Regression is to ascribe the variance of response variable as much as possible amongst the independent variables.

Now here lies the trick of improving the prediction of multiple linear regression model. The response variable you are dealing here with gets affected by a number of explanatory variables. Some of them are straight way visible to us and we can say with confindence that they are main contributor towards the response. And all together they can give you a good explanation too.

But with a good knowledge of the domain one can identify many other variables that are not directly recognizable as causal effects. For an example if we take the example of any agriculture experiment, crop yield is determined by so many direct, indirect, physiological, chemical, weather variable, soil condition etc.

So, the skill and domain knowledge of the researcher play a viral role to choose variable wisely in order to improve the model’s fit. Using too less variable will result in a poor R2 whereas using too many variables may produce a very complex model with a very high R2. In both of these scenario model’s performance will not be up to the mark.

References:

  • https://www.wikipedia.org/
  • https://www.statisticshowto.com/
  • https://towardsdatascience.com/